Guide to using Rootlab’s cordyceps militaris grow kit
This guide and FAQs will assist you in using our kit. Remember that this kit is designed for educational purposes to introduce you to the world of medicinal mushrooms. Always adhere to safety guidelines and do further research where necessary when consuming our cordyceps militaris as tincture or powder.
Step-by-step-instructions
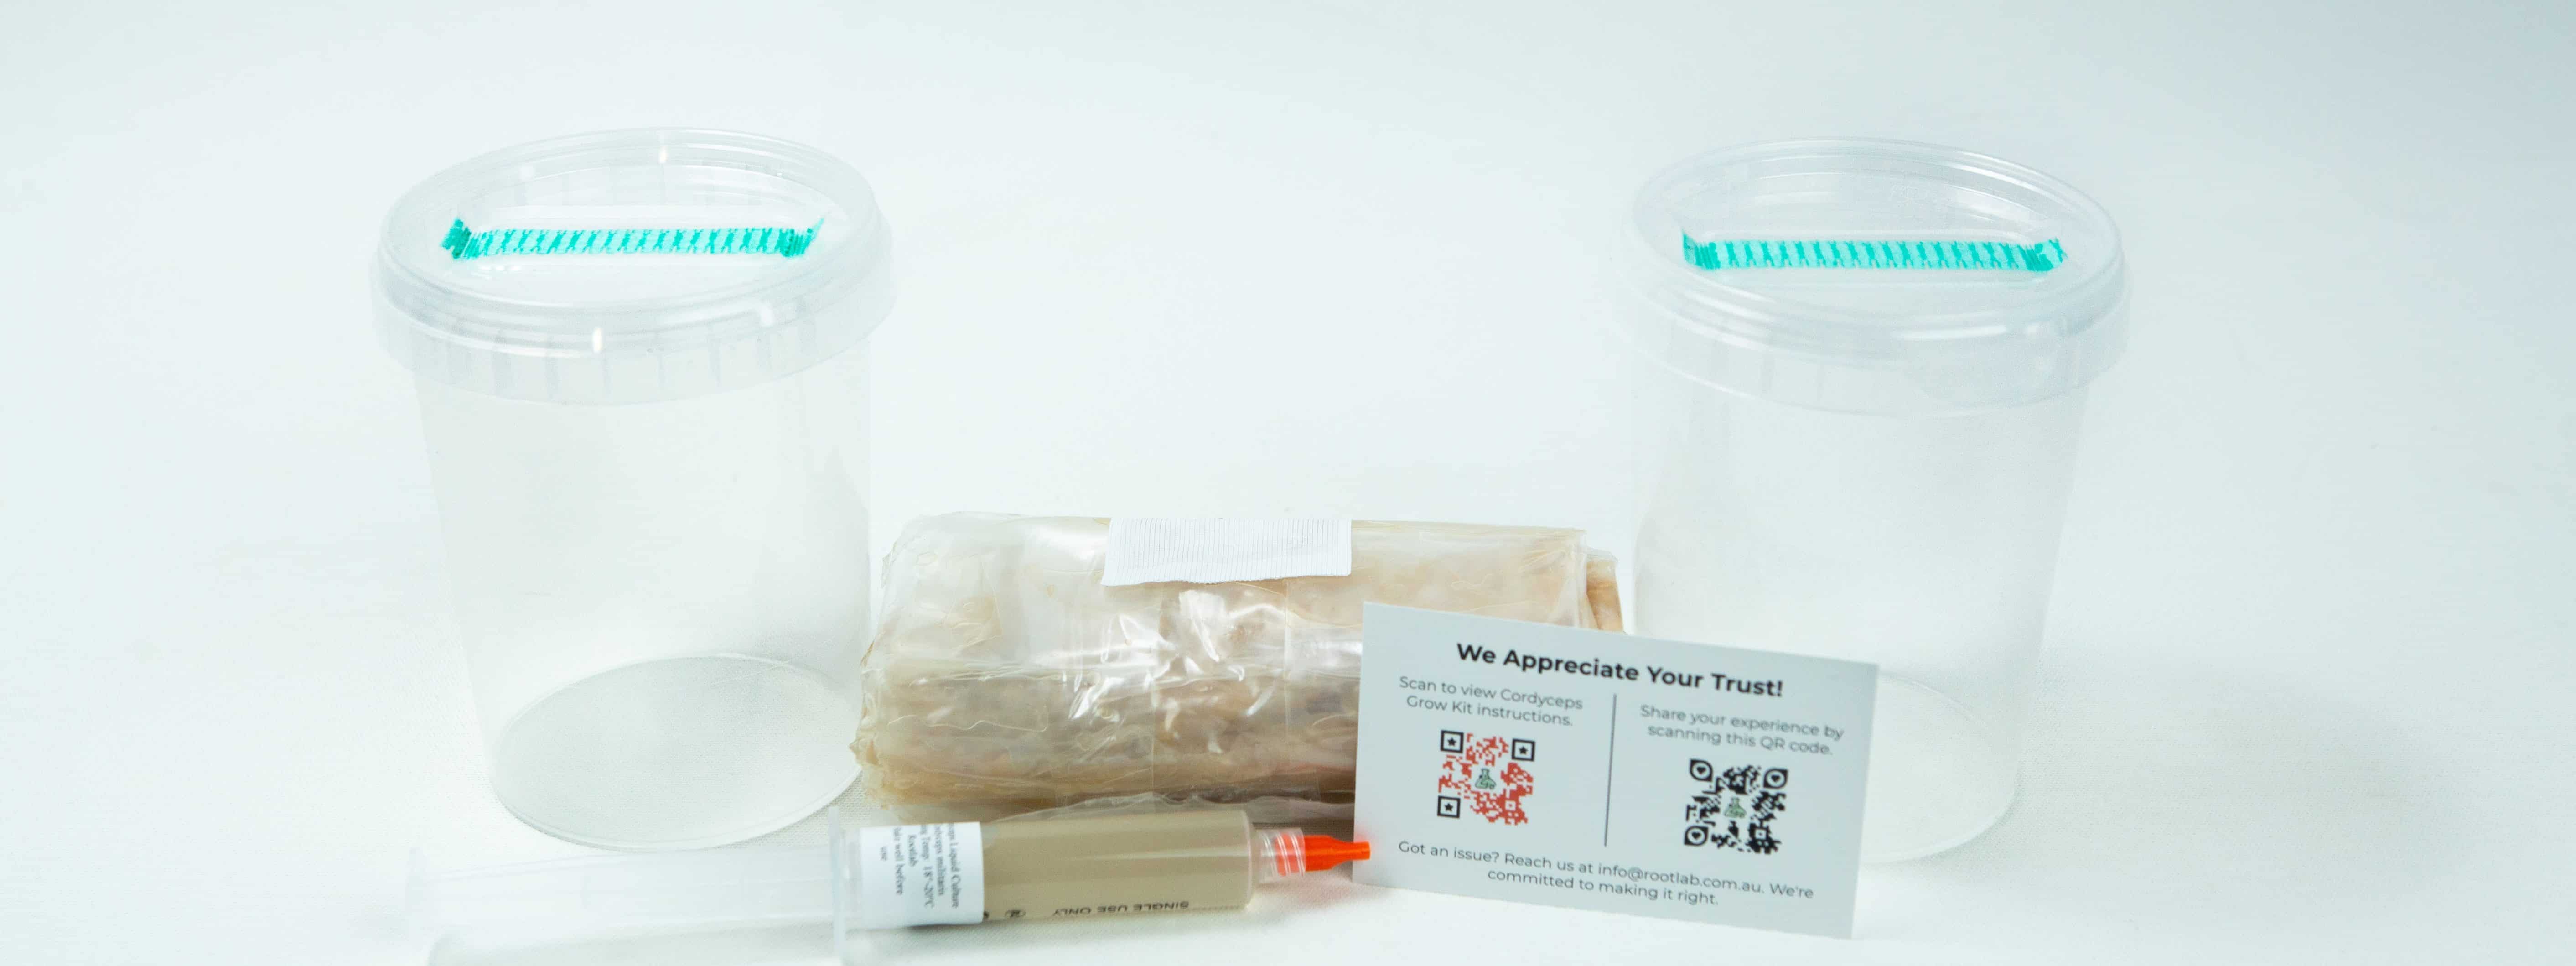
Step 1: Setup
First, unpack all items and then watch the instructional video to familiarize yourself with the process.
Sanitize your work surface with the isopropyl alcohol (rubbing alcohol) that came with the kit. Store alcohol safely away from children and pets. This alcohol is not for consumption and is also highly flammable, so keep it away from naked flame.
Clean your work surface, gloves, scissors, substrate, and syringe with fresh paper towels, as shown in the video. It’s a good idea to leave the alcohol on the work surface and equipment for at least 30 seconds before wiping.
Step 2: Substrate Preparation
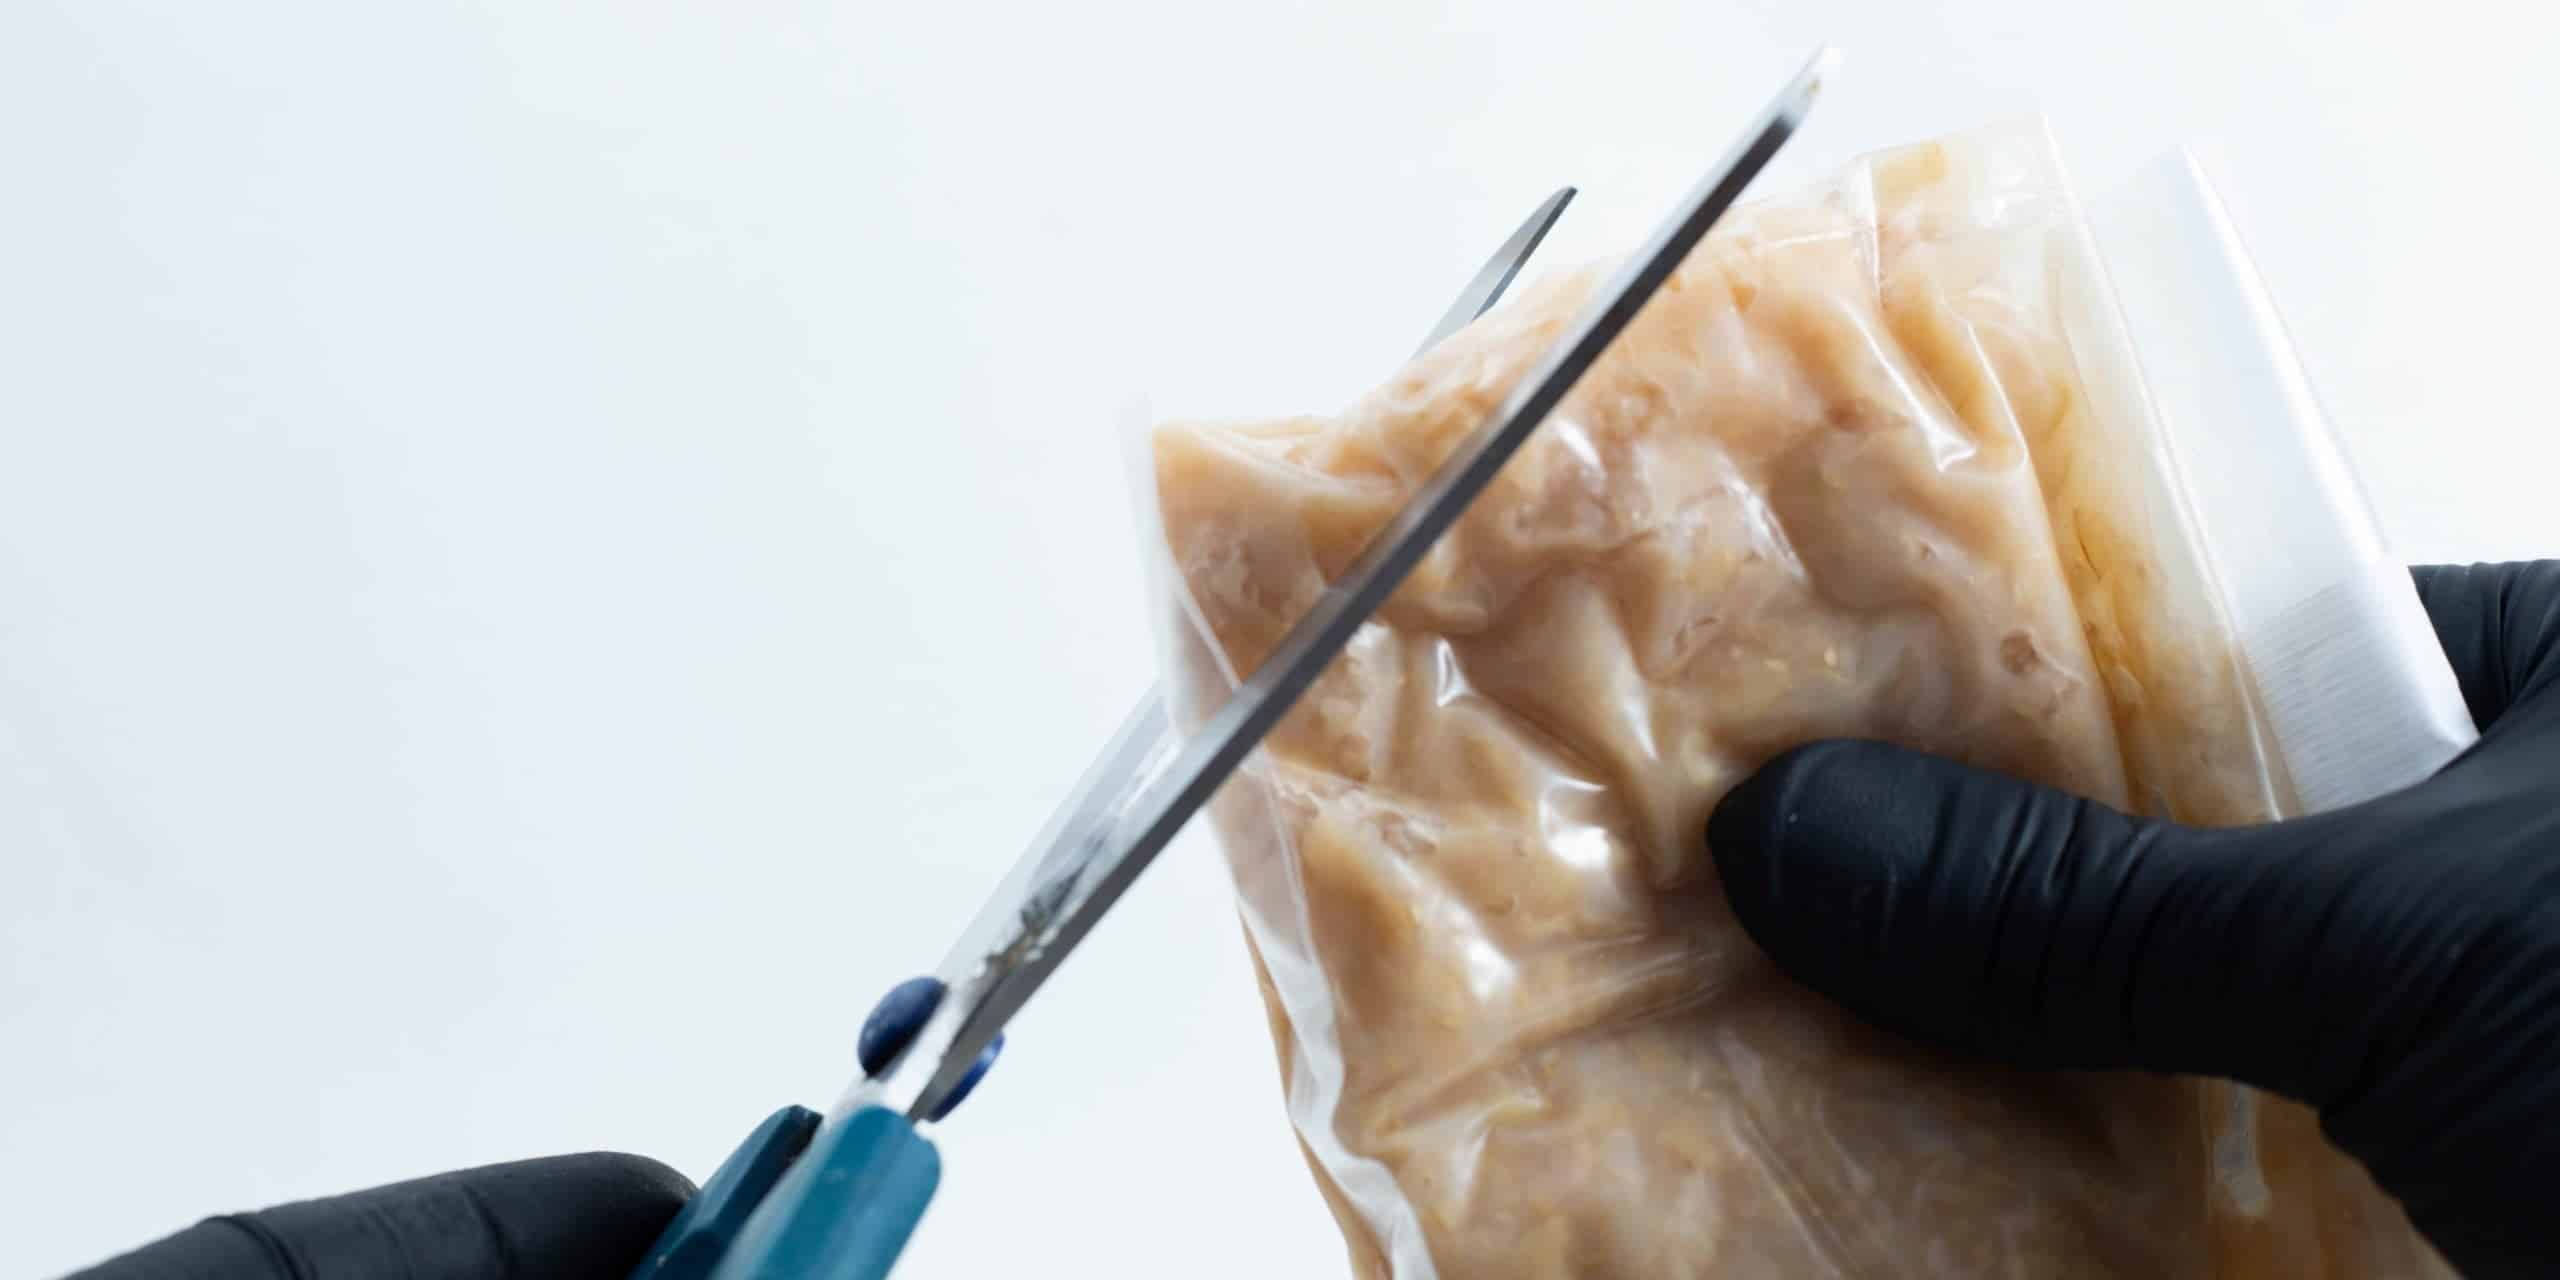
- Cut the corner of the substrate bag with sanitized scissors.
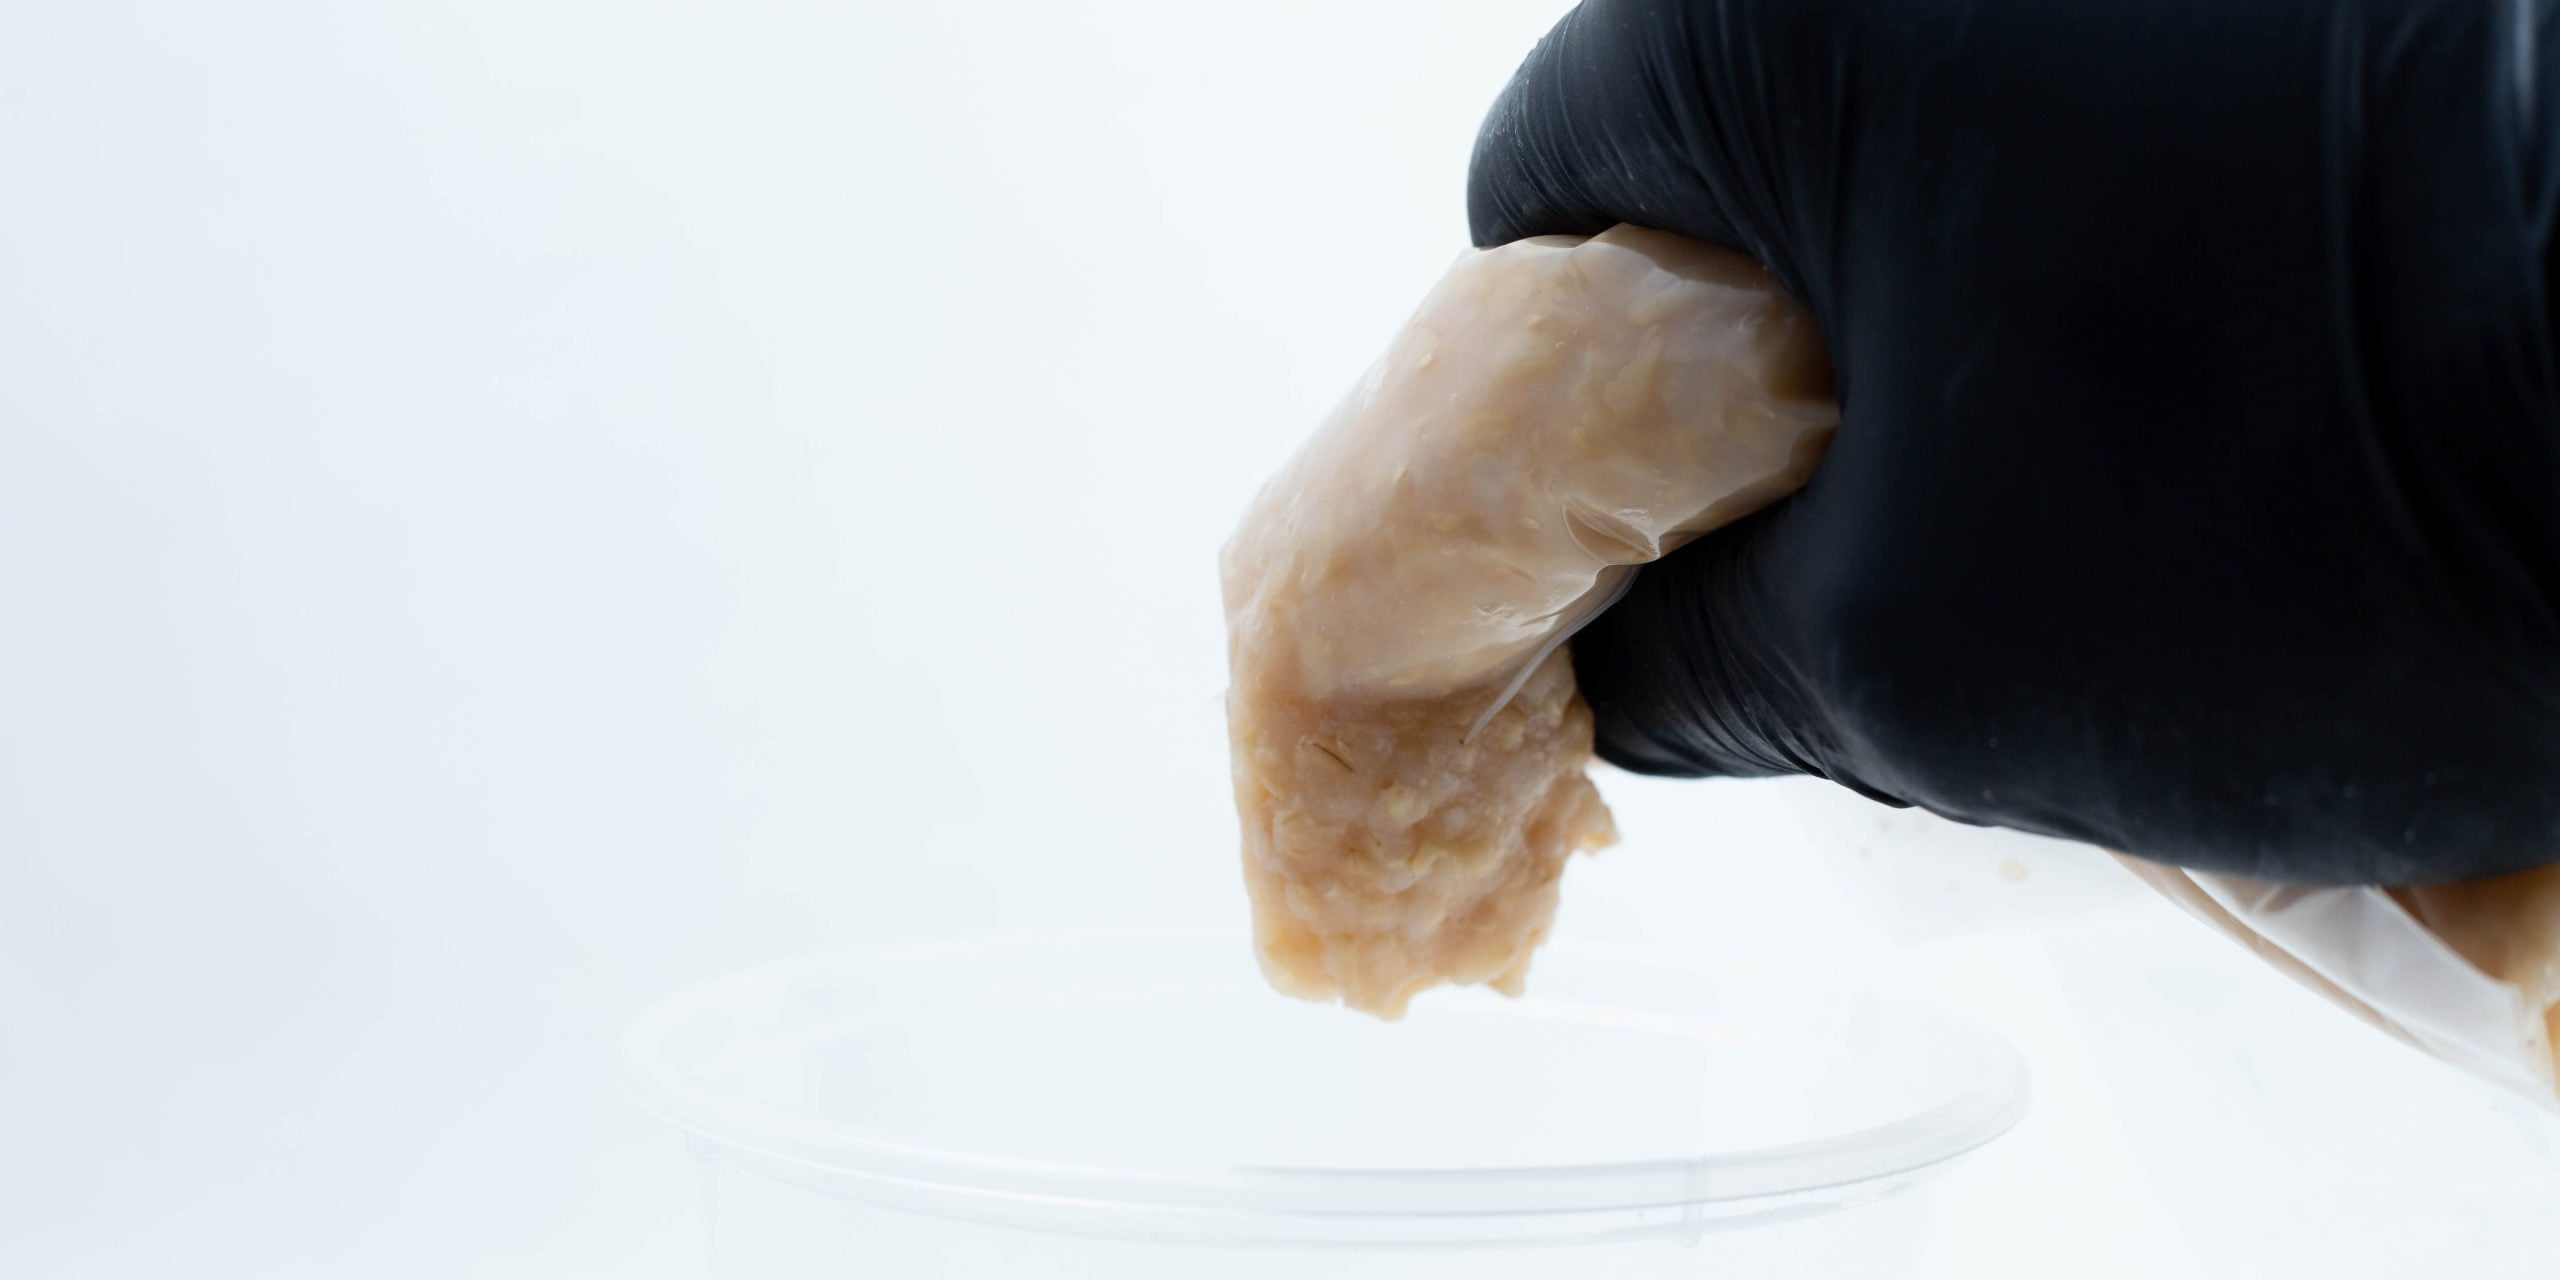
- Open the containers one container at a time and pour half the substrate in. To open the container for the first time, remove the plastic tab labeled “open” to release the lid. Each container should be filled to around 2 cm. Try not to get the substrate on the side wall. If some substrate gets stuck on the side wall, ignore it and do not attempt to clean it up to avoid contamination. Your main goal is to divide the substrate and the extra liquid in the substrate equally. Do not put all the liquid from the substrate in one container, as nothing will be left for the other container. You can choose to do this step simultaneously with 2 containers to divide them equally. Mix the substrate properly before cutting it and then pour the content.
- The bluish-green air filter on the lid should not be removed at any stage. This air filter ensures proper airflow for your mushrooms. It protects against contamination. There is no need to spray isopropyl alcohol on the lid. Both the container and the lid are made from polypropylene and can be autoclaved if you want to reuse them to grow more cordyceps in the future.
- Be sure to put the lid back on as soon as possible. Leaving it open increases the risk of contamination.
- Do the above steps quickly in a still room. Ensure no air-conditioning or fan is turned on, and that no window is left open.
Step 3: Leveling the Substrate
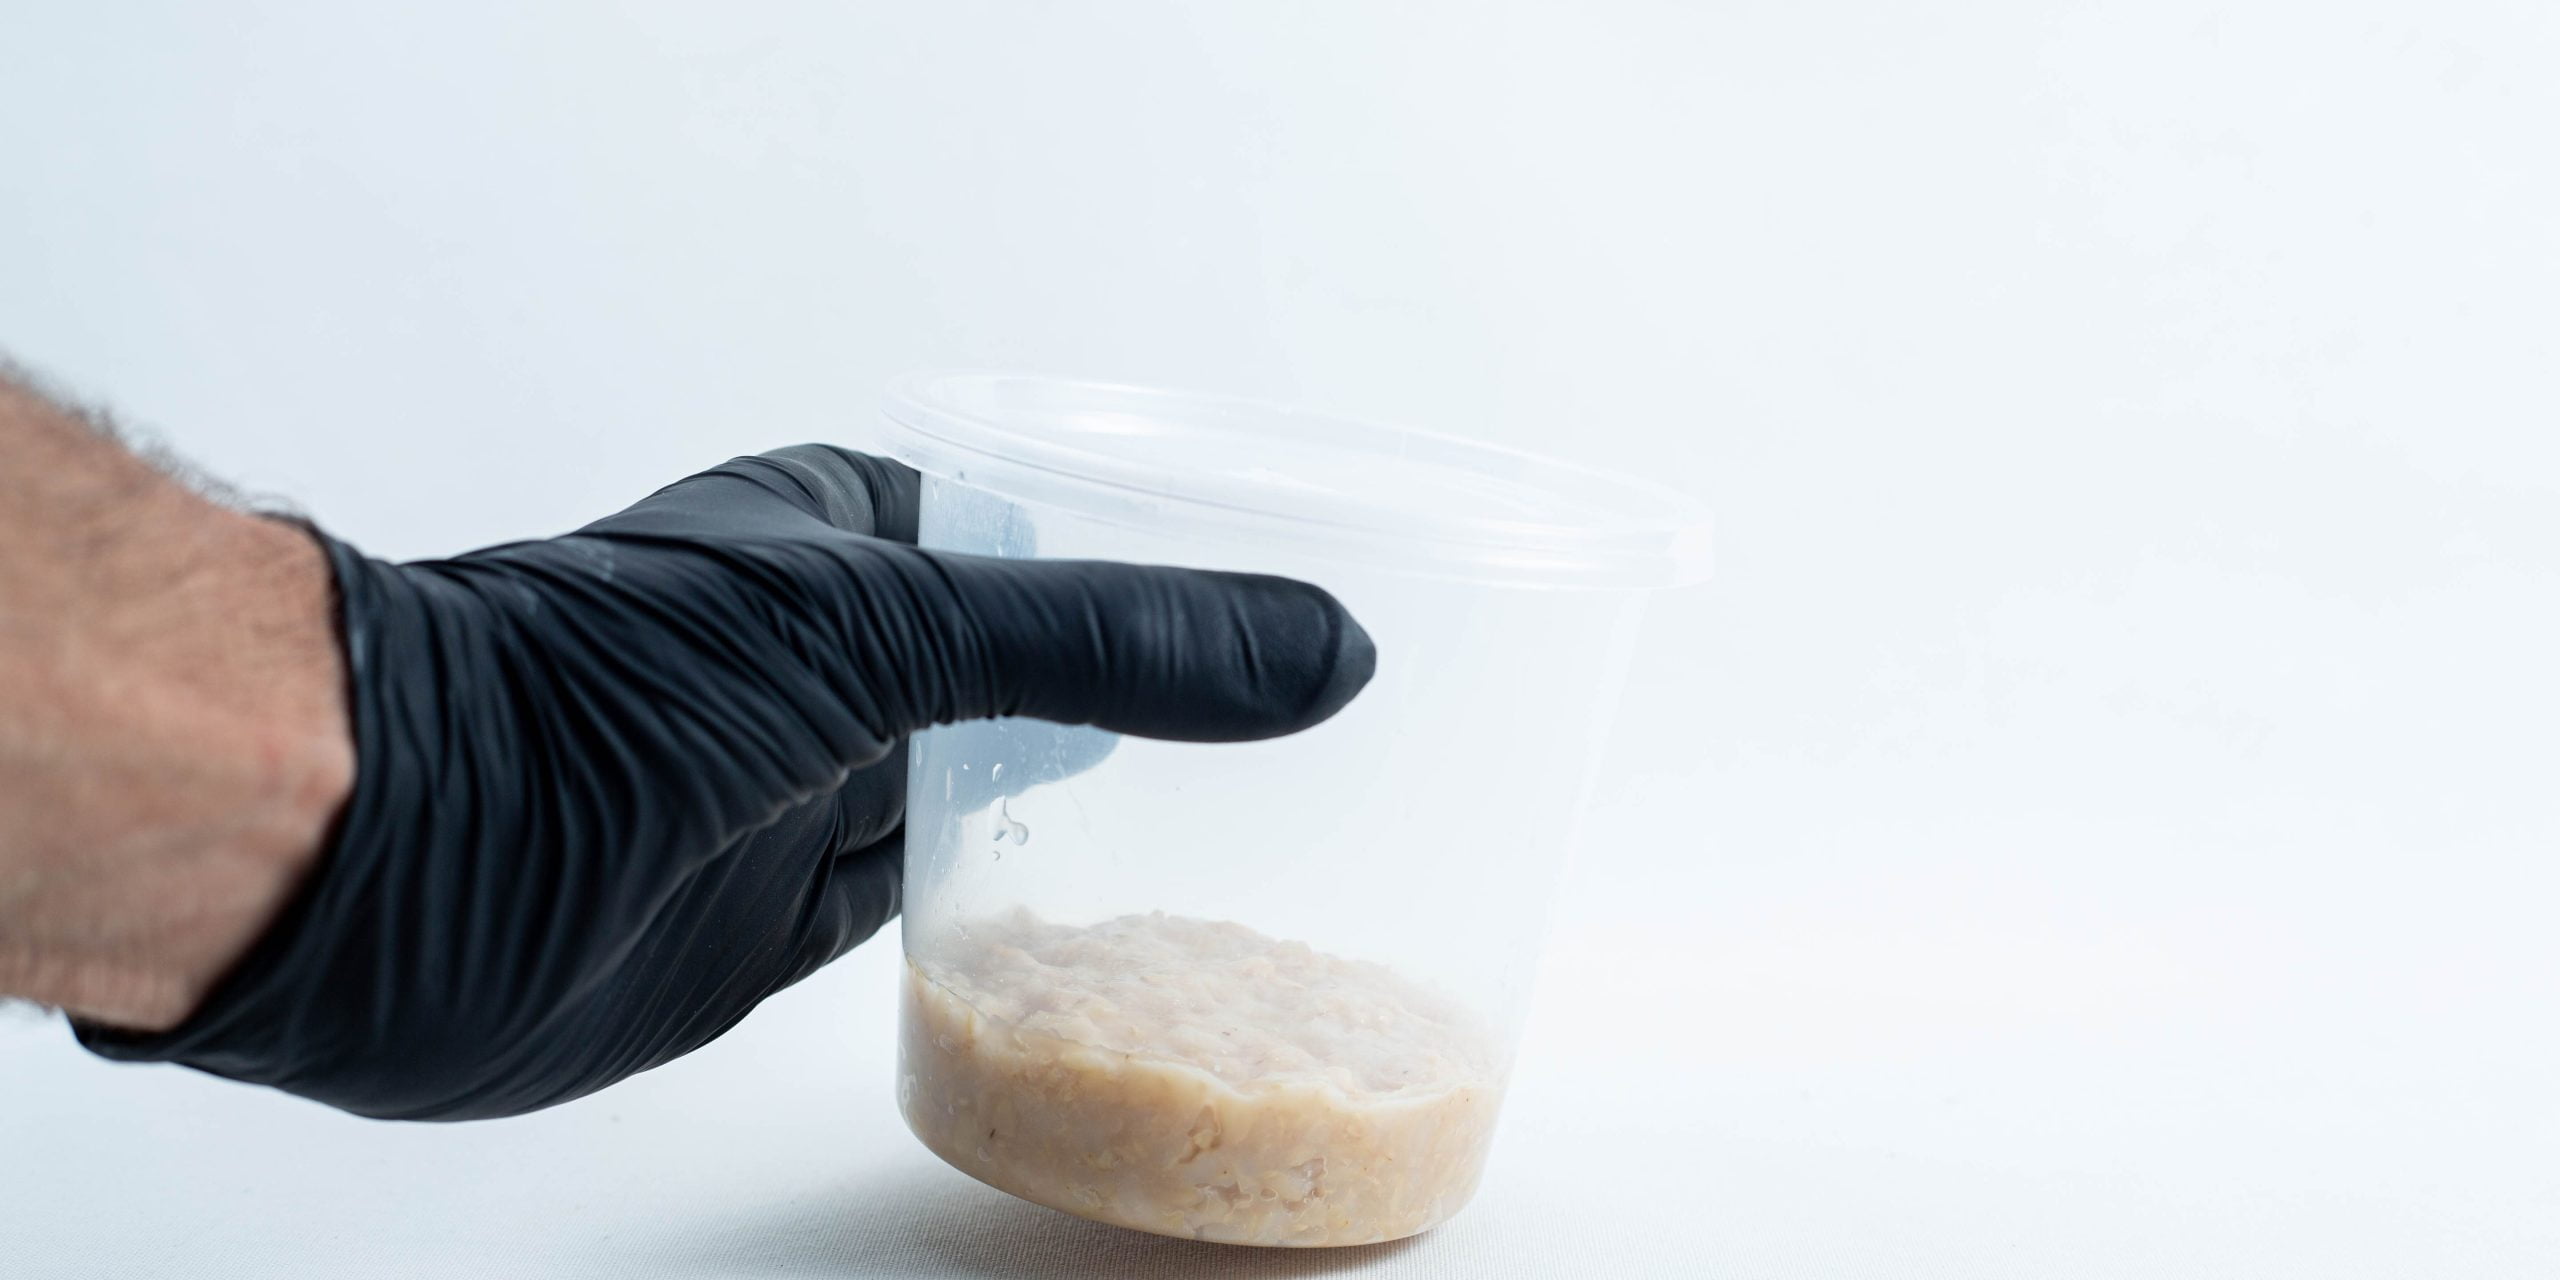
Tap the container until the substrate is somewhat flat. Uneven surfaces are fine; they won’t affect mushroom growth; they will only affect the aesthetics.
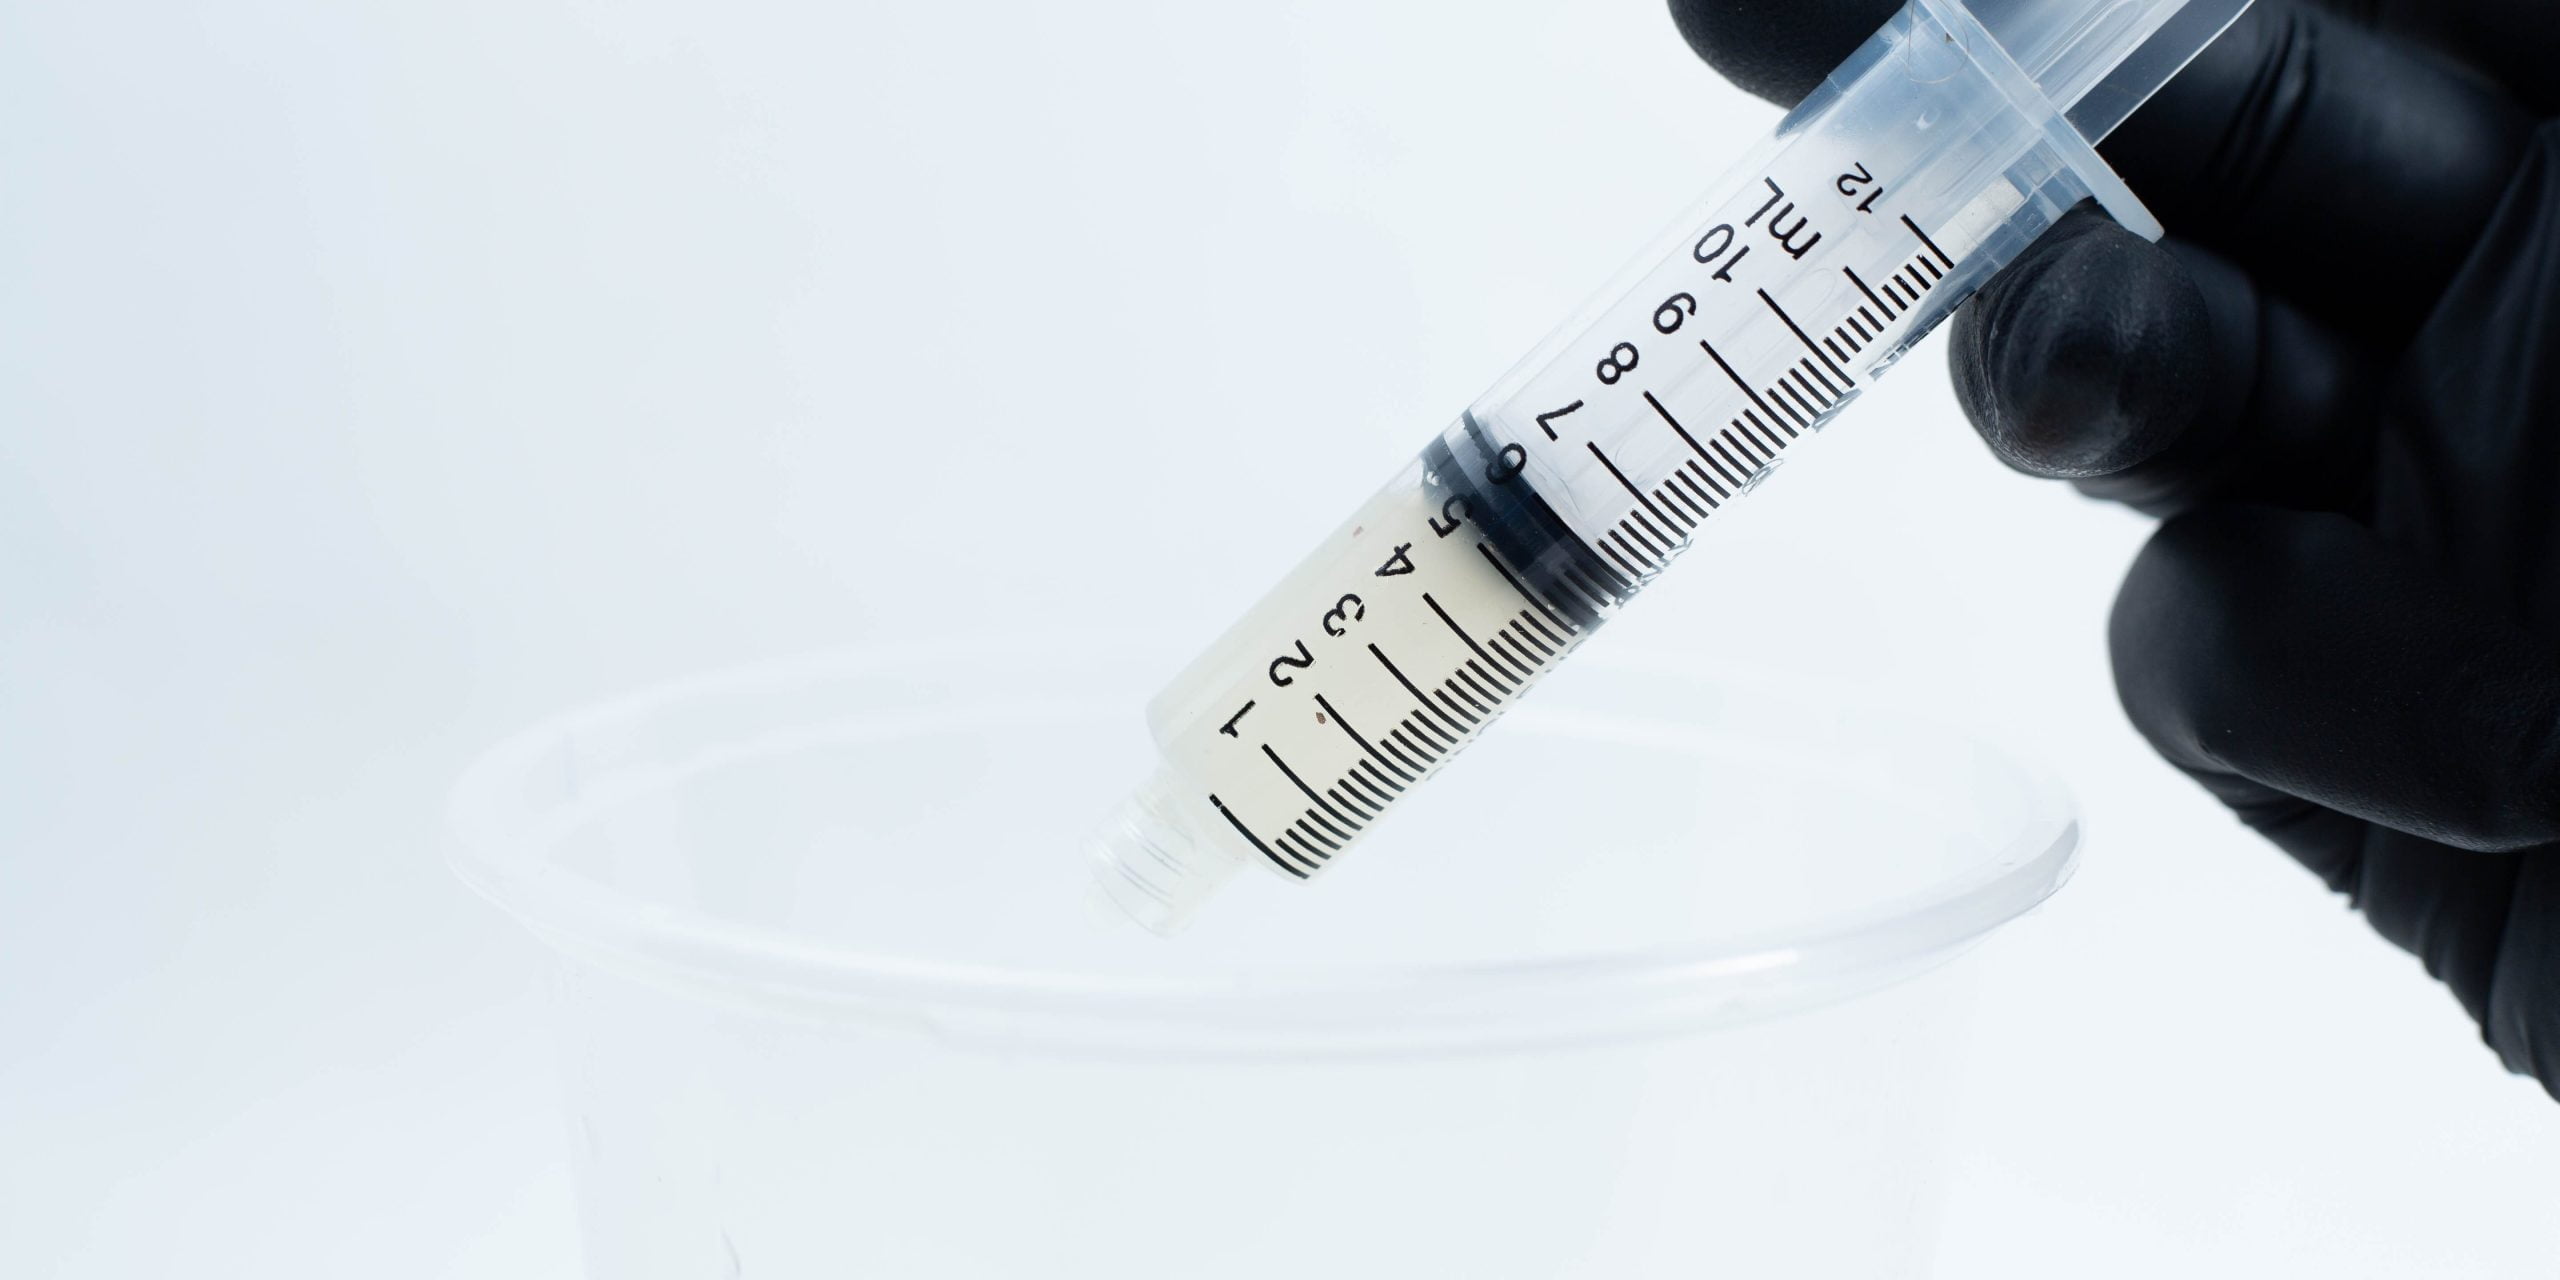
Step 4: Inoculation
- Inject 5 ml of the syringe contents into each container.
- Seal the lids of the substrate container; they must remain closed to avoid contamination. You may need to press down firmly all around the lid to ensure it is sealed. Listen for the click. Don’t put too much pressure; the container will break.
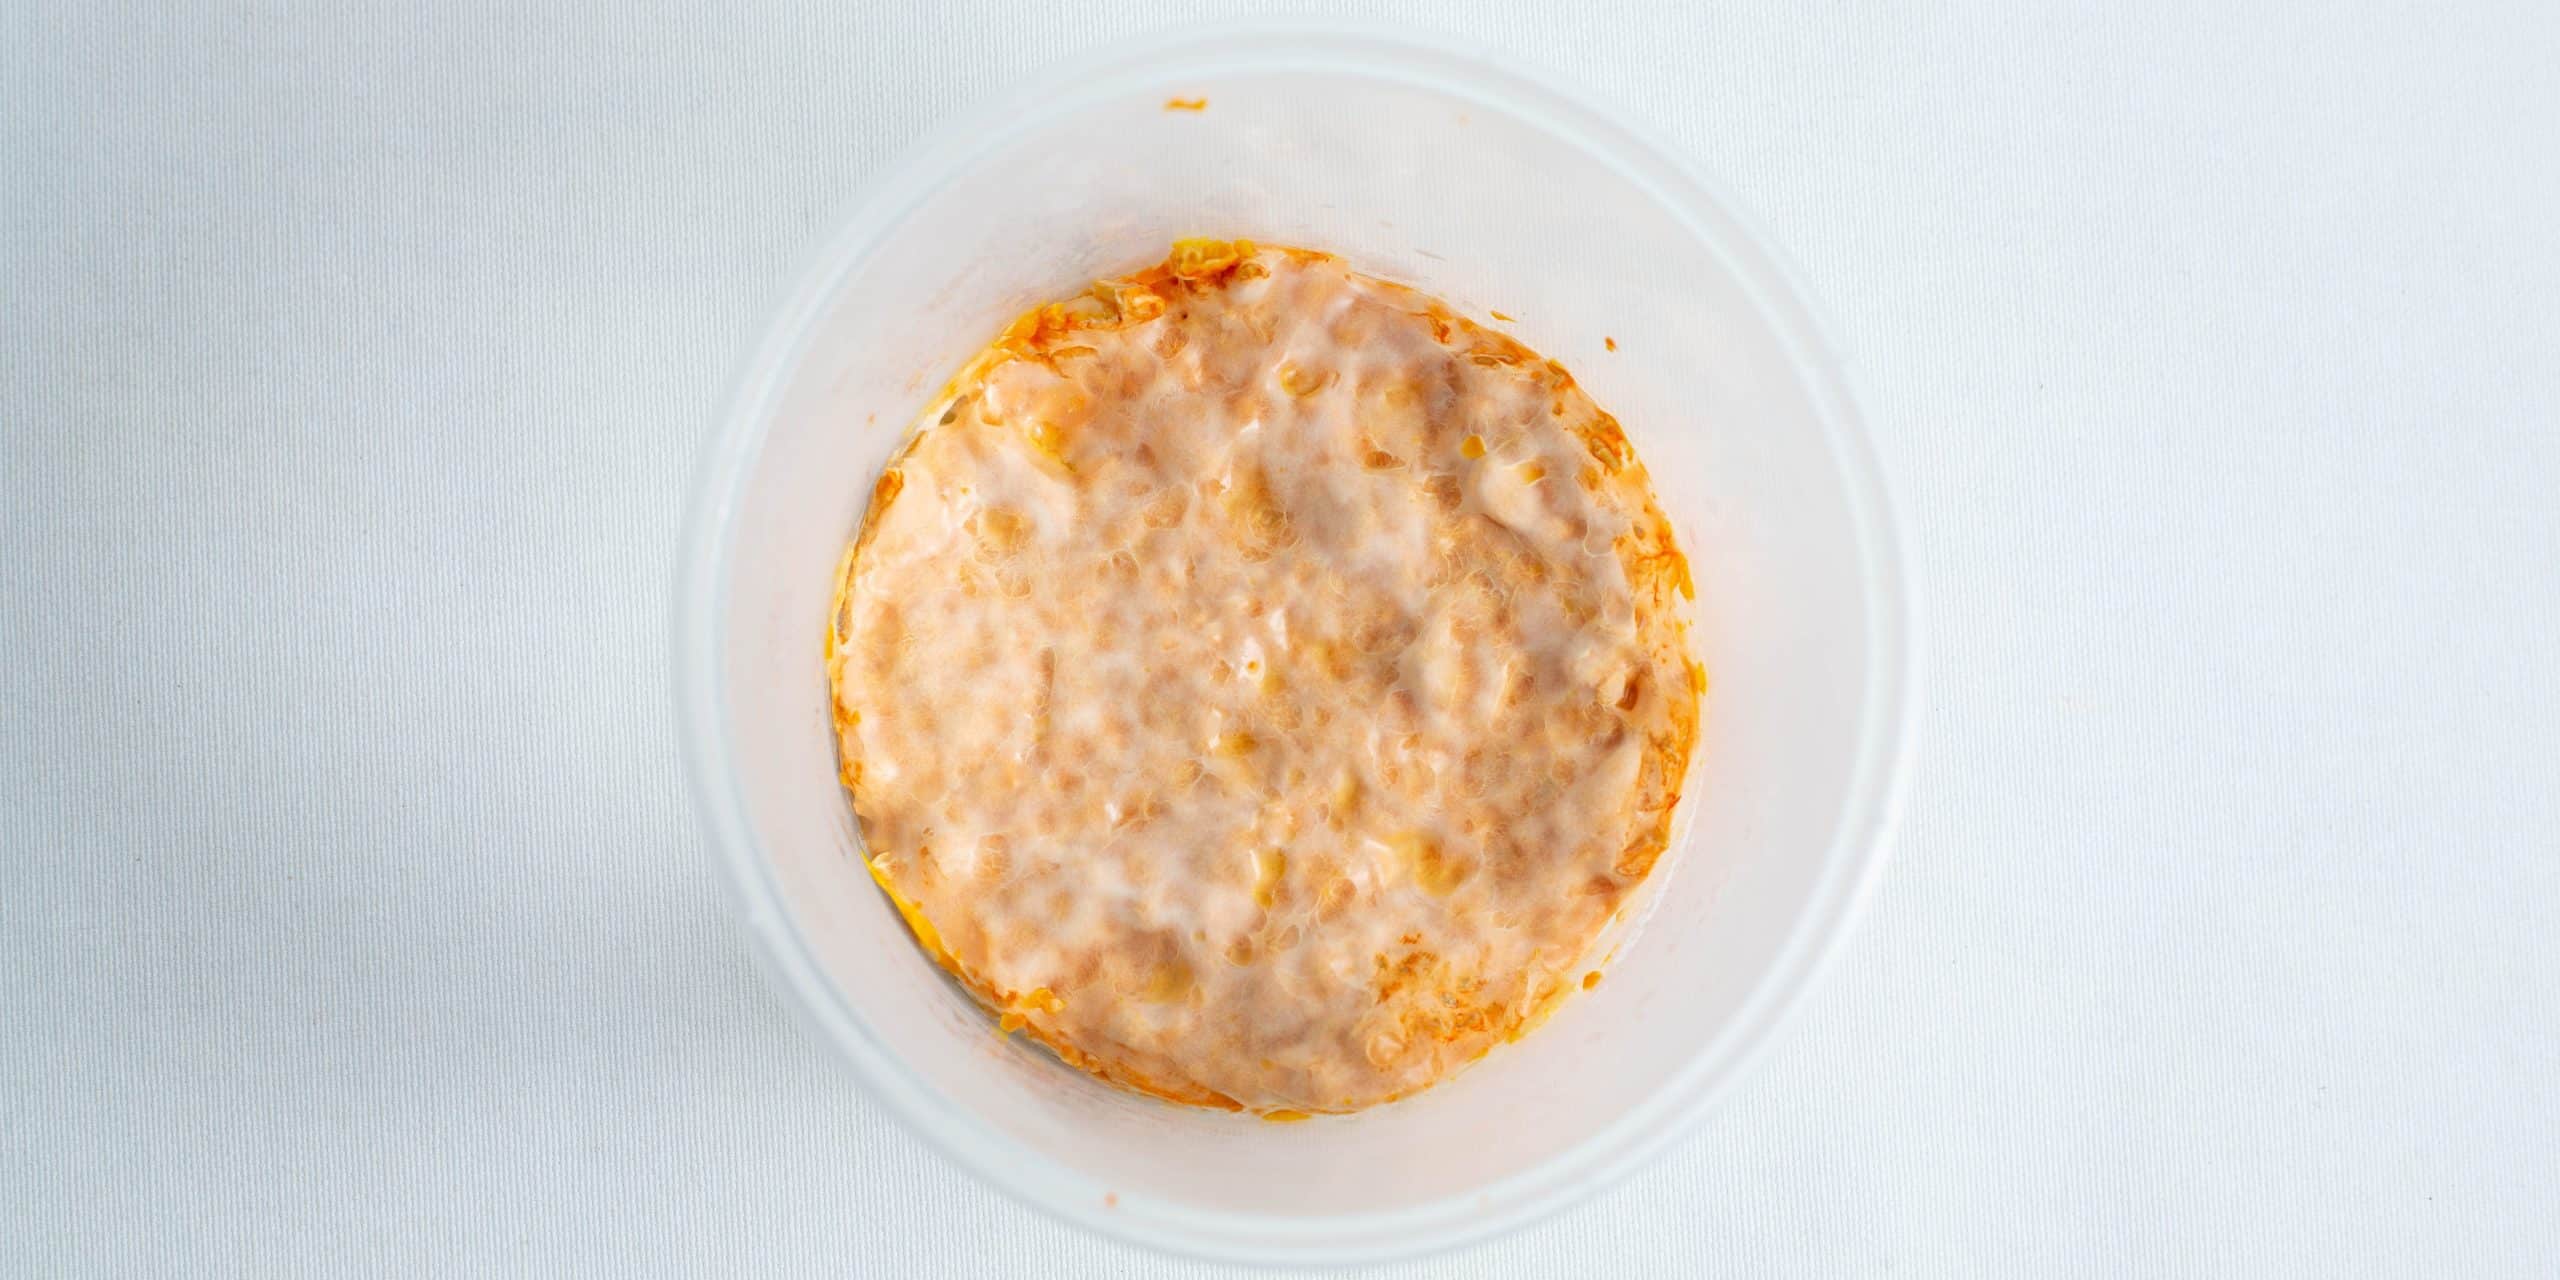
- Once the substrate has been inoculated, place it in complete darkness for 3-4 days and then place it underneath light for 14 hours straight and then in darkness for 10 hours straight each day (14/10 cycle). The light source should not emit heat. The best light source is a 6000-6500 k white LED strip. The temperature should not go above 20° C. The best temperature is 18°C.
Step 5: Monitoring
- Label each container with the date it was inoculated.
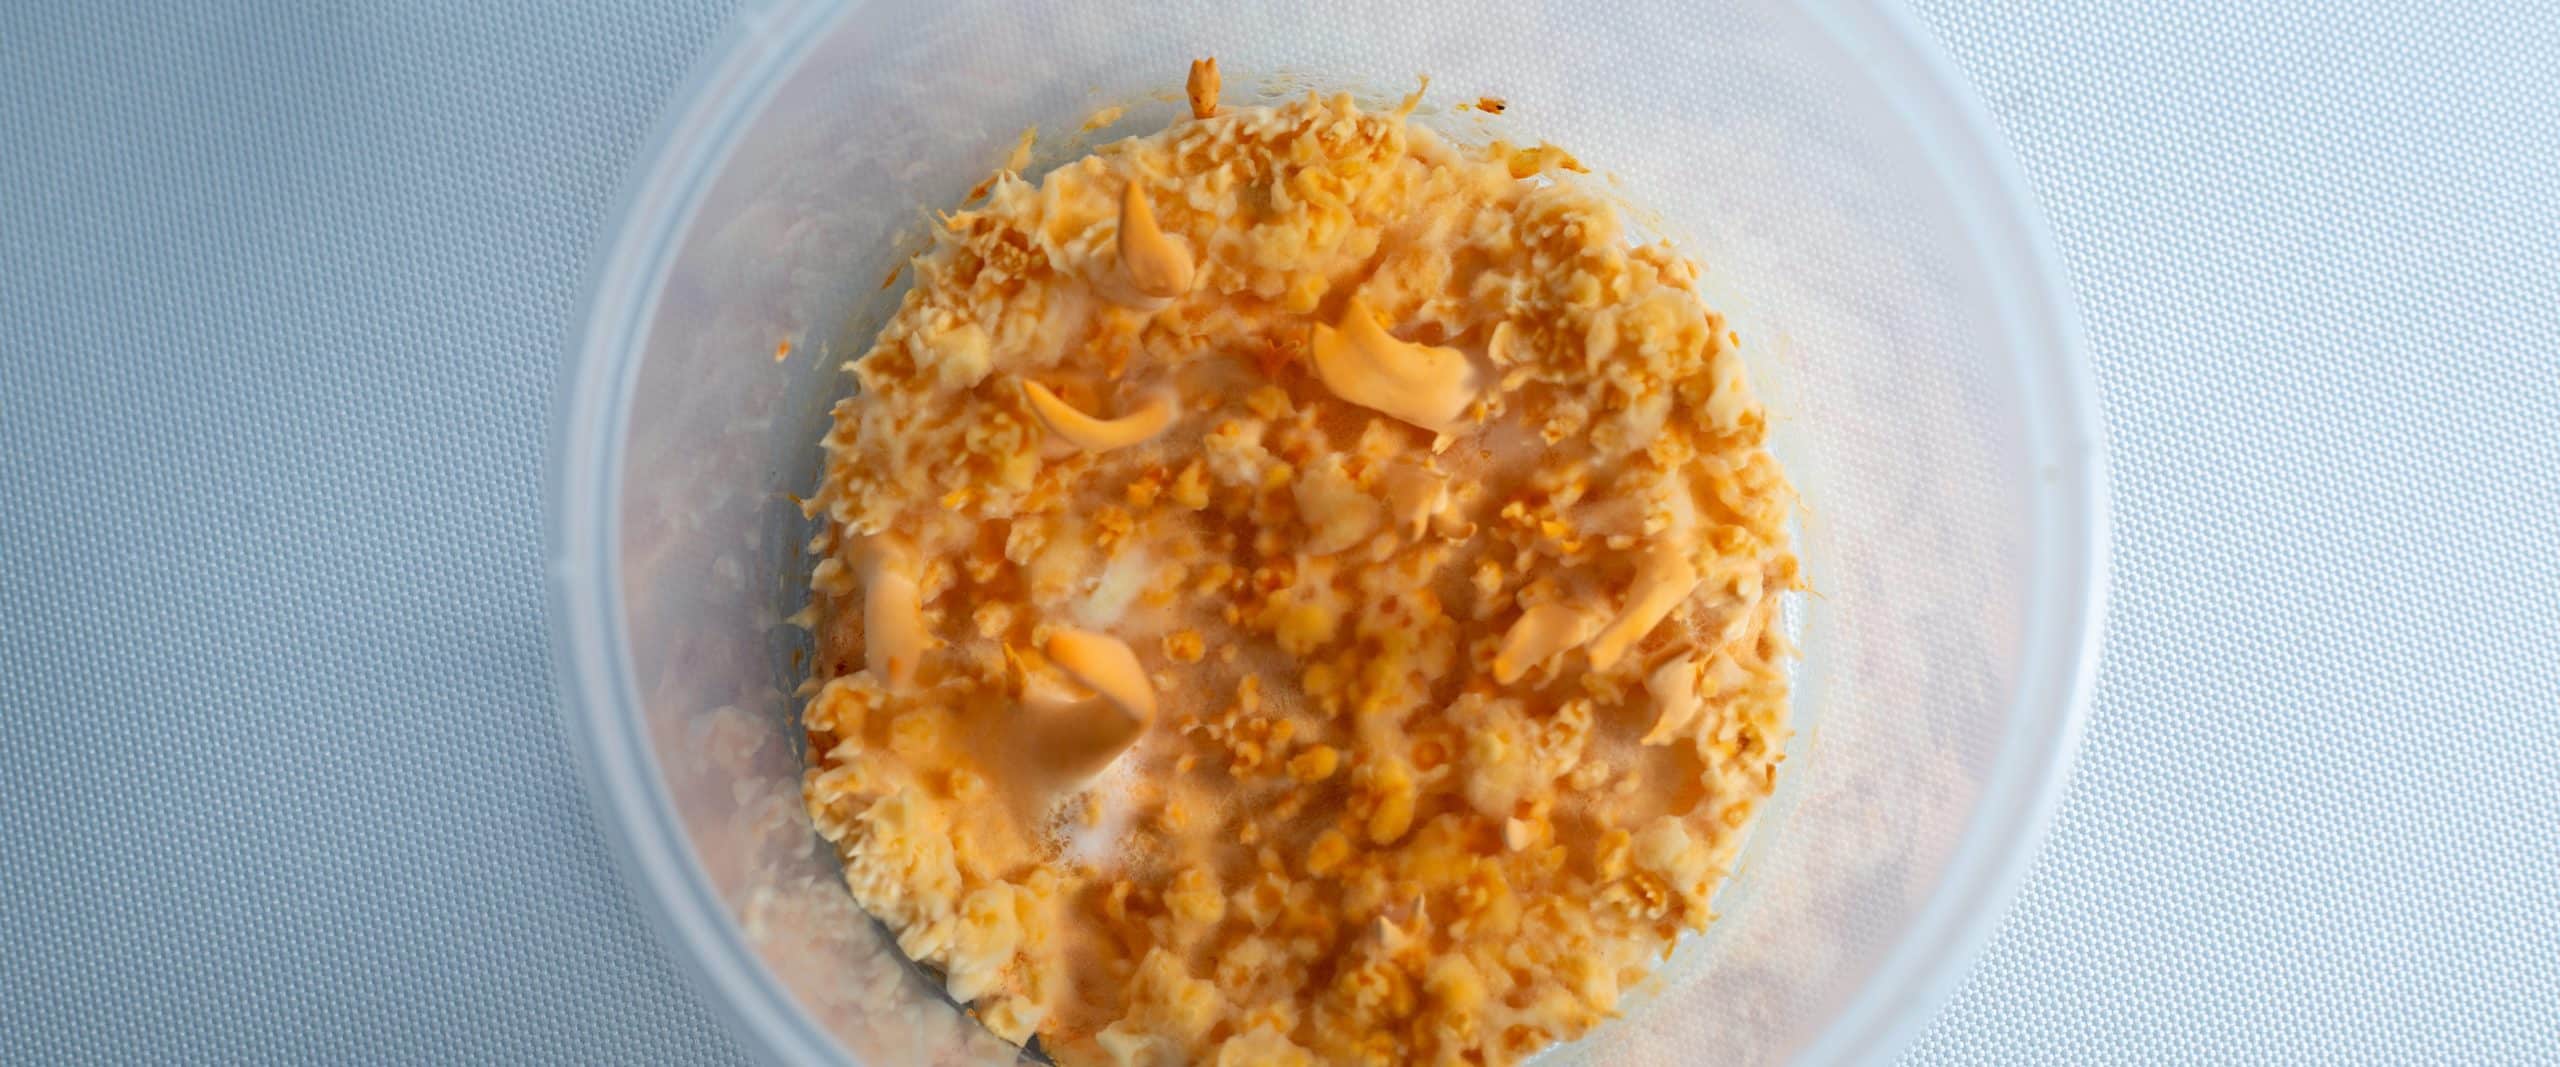
- Set a reminder for 45 days to check on the mushrooms for signs of growth. Meanwhile, monitor for contamination.
Step 6: Research and Community
- Start researching tincture preparation and join relevant Facebook groups.
- Please do not ask for tincture-making support from us (this area is out of our scope), and make sure to research proper dosages and safety for pets, children, and adults independently.
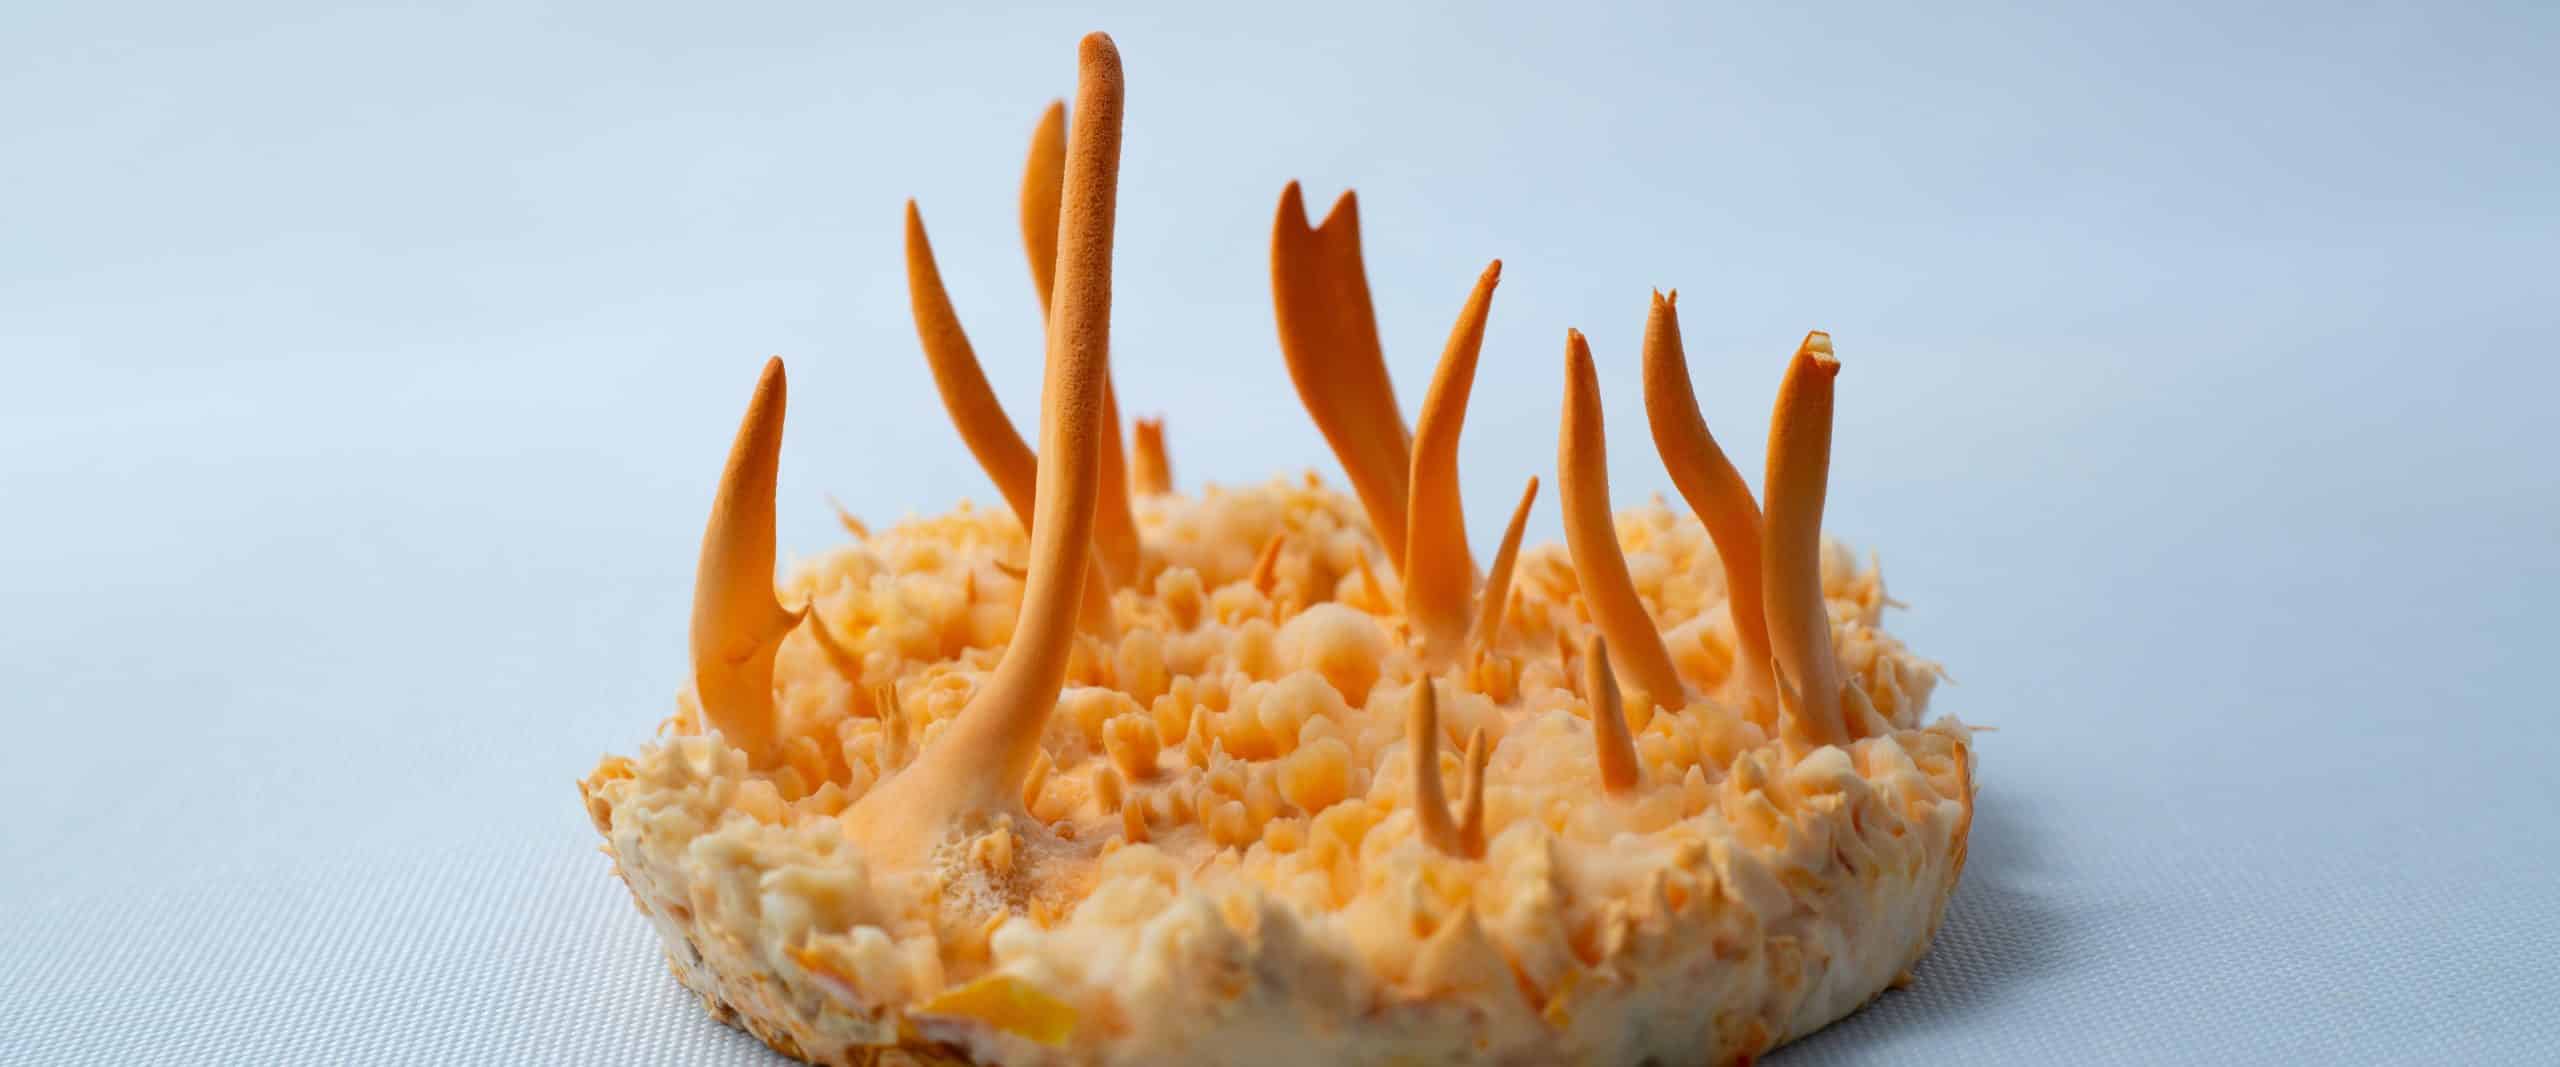
Step 7: Harvesting and storage
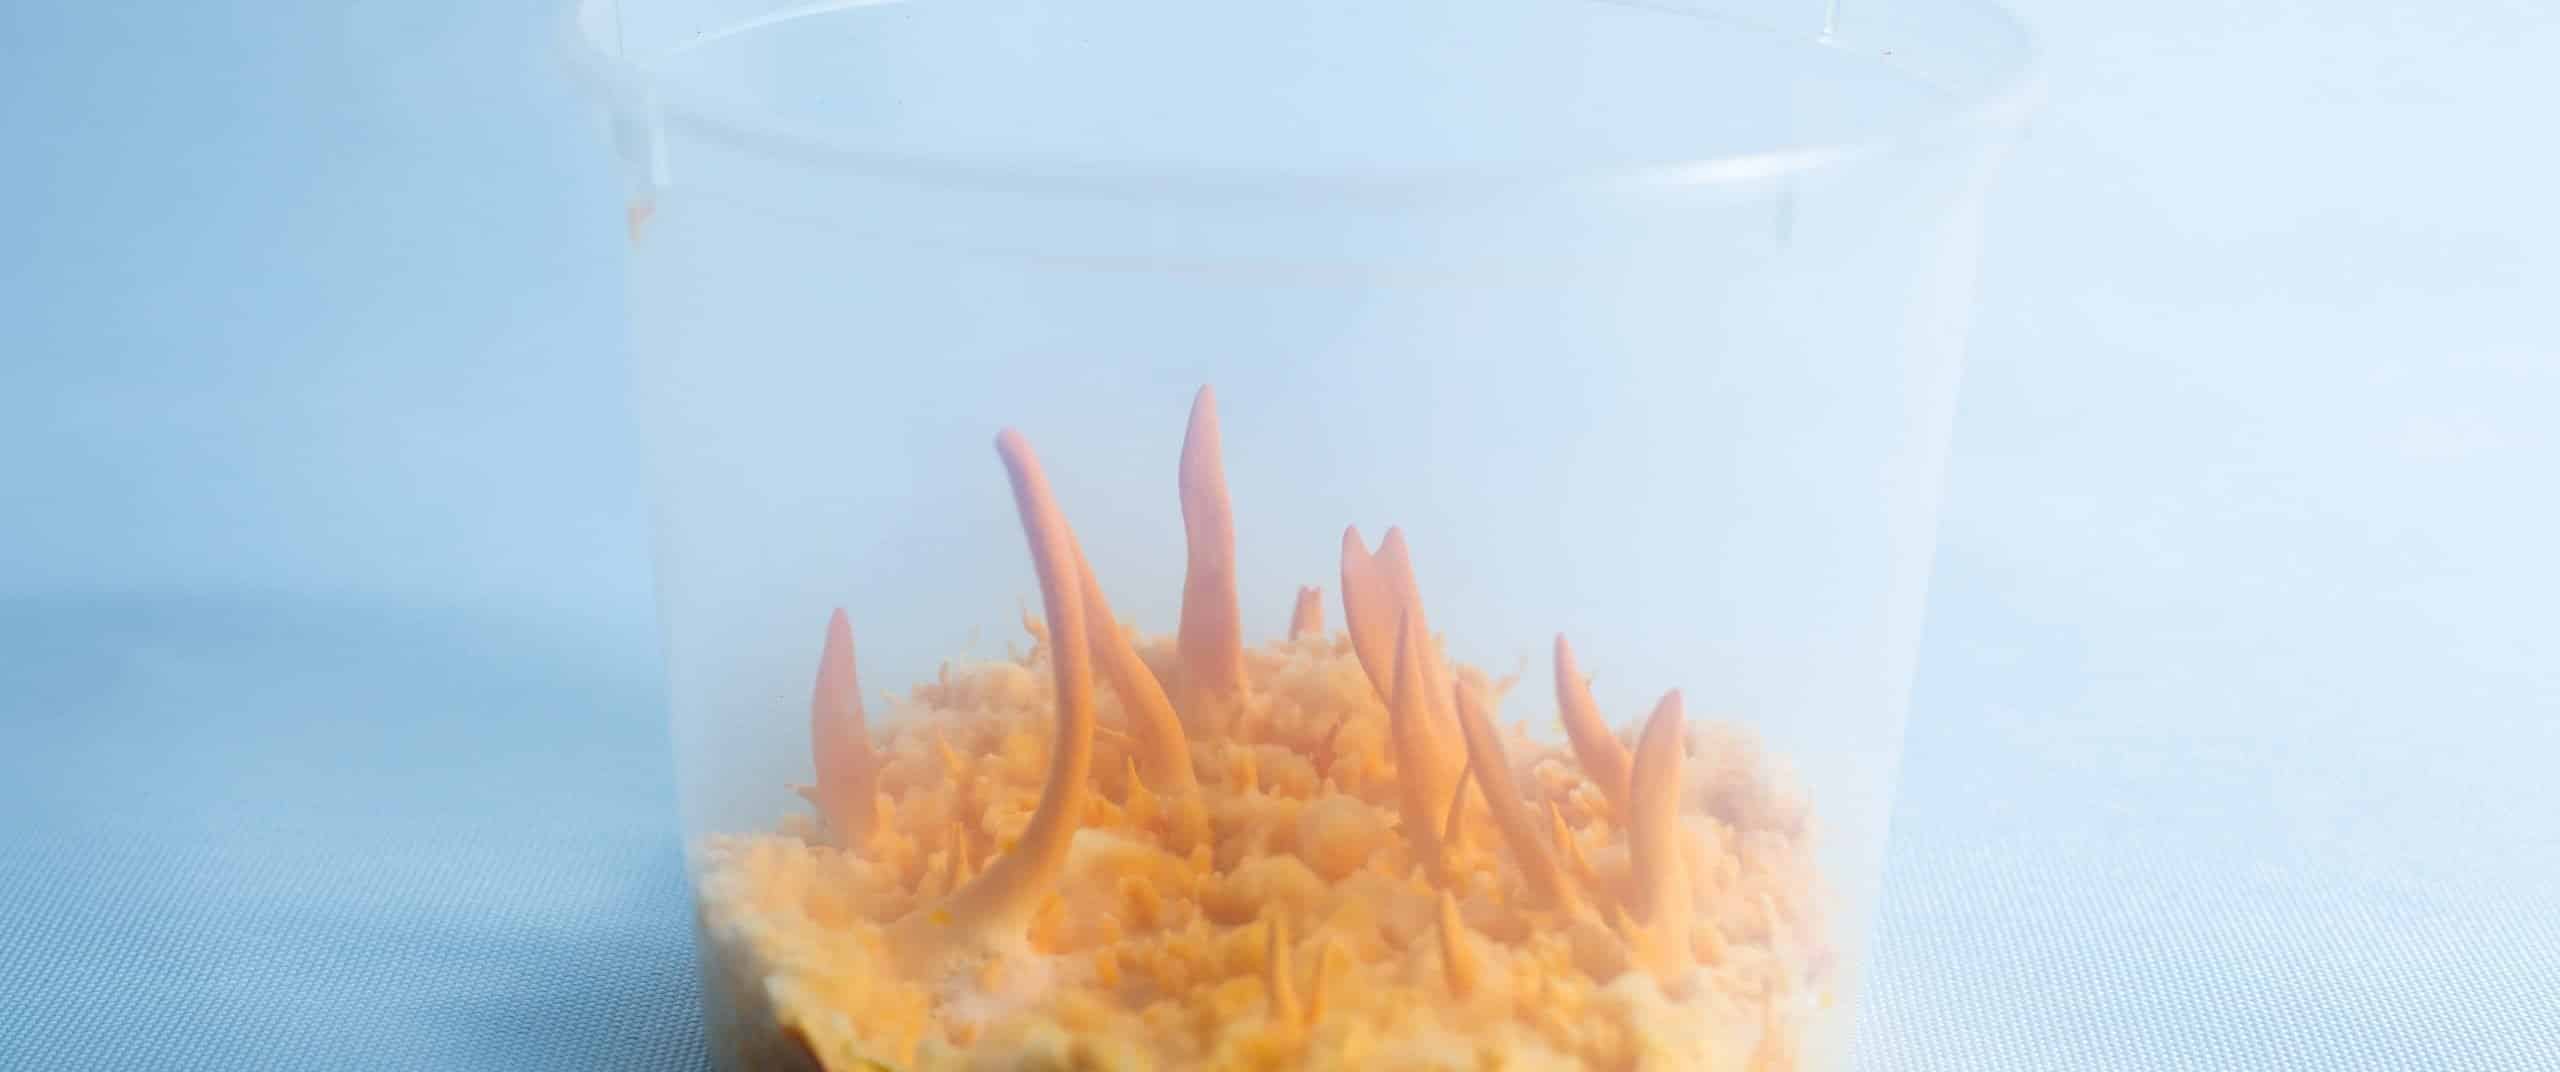
- At around the 60-day mark, loosen the cake from the container sides and remove it.
- Cut the mushrooms from the base and store them wrapped in a fresh paper towel.
- For maximum nutritional benefits, keep the harvested mushrooms in a zip-lock bag (wrapped in a paper towel) in the fridge for up to 3 days.
- You can also choose to dehydrate your mushroom.
Step 8: Next Steps
- Consider buying your own liquid culture and start growing Cordyceps at home on your own. You are not a beginner anymore, after all. You have grown one of the most difficult mushrooms to grow.
- We will answer all your questions relating to growing them via phone (Jae 0416 399 905), email ([email protected]), or website chat.
Cordyceps Grow Kit FAQ
If my substrate gets contaminated, can I still eat the mushroom from it?
No, you can't.
Making tincture or cooking will kill the contamination but will not destroy the toxic substance that results from contamination. Since we do not know what contamination is inside, please play it safe. Don't use. Discard it!
Can I reuse the containers?
Yes, if you clean them with warm, soapy water and a soft sponge and sterilize them in an autoclave.
Can you consume the mycelium in the substrate?
Technically, yes, but we do not recommend it. Our substrate is designed for fruit production, not direct mycelium consumption.
If we wanted to eat the mycelium, we would have designed our substrate very in a way that it only produces mycelium and not fruits.
Can you dry your Cordyceps and make them into powder?
Drying and powdering Cordyceps is out of the kit's scope and requires deep knowledge of oxidation, heat, and other factors to preserve potency.
You may do so if you wish, but please do your own research. Our part is to help you grow.
What is the recommended temperature for cordyceps?
The recommended temperature for growing the Cordyceps is 18-20°C,
If the temperature goes above 20° C, Your cordyceps will either deform or not grow.
Does the kit require maintenance?
The kit is designed to require minimal maintenance once set up. You only need to check it for contamination.
We also check for mushroom pinning around 45 days.
Where should I store the kit before using it?
If you haven’t started using the kit yet, it needs to be used between a week (for the best results) and up to a maximum of 3 weeks.
Cordyceps are also extremely sensitive to light. They start changing color from white to orange and undergo some major changes in their structure. Therefore, the syringe must be kept in the fridge and not exposed to light. To do this, wrap it with foil paper inside a zip-lock bag.
Only store the syringe in the fridge, not the substitute bag or the container; leave them in the cupboard.
The fruits, however, can be stored in the fridge when harvested but are best consumed soon or dried.
When should I expect harvest?
Harvest is expected around 60 days, and the yield from one container is between 10-45 grams (fresh) approx. This yield will make tinctures that will last for at least two months.
How much time and care does this kit need?
It should take approximately 5 minutes to read the growing guide, 5 minutes to watch the instruction video, 10 minutes to clean all equipment using the alcohol spray bottle and set up the kit, and finally, about 5 minutes to harvest after 60 days.
You may need to spend additional time researching cordyceps, its benefits, side effects, and ways to consume it.
Do you have a recipe to make my own substrate?
Keep in mind that the secret lies in the broth. The liquid cordyceps culture you've received in the syringe is concocted using a unique formula that diverges from standard liquid cultures, containing over seven distinct ingredients. Below, we'll share a simplified version of the recipe Rootlab used to prepare your substrate, which is designed to fill five to six circular takeaway containers:
Ingredients for the substrate:
- Brown Rice: 200 grams
- Potato-infused Water: 600 ml (Boil potatoes in water under a gentle flame for about 20-30 minutes, then remove them before they become mushy)
- Glucose Syrup: 25 ml
- Yeast: 5 grams (a vitamin B1 tablet, finely crushed, is an alternative)
- Soy Peptone: 1 grams
- Azomite: 1 gram (Purchase available on our website)
- Pea Protein:5 gms
Required equipment includes a pressure cooker, a mushroom cultivation bag, LED lights, and round takeaway containers, ideally ones that can be autoclaved.
Procedure:
Before Sterilization:
- Thoroughly wash two medium-sized potatoes and quarter them (no need to peel). Boil in approximately 600 ml of water. Allow to cool to a warm temperature, then dissolve 25 ml of glucose syrup into it.
- Rinse 200 grams of brown rice 4-5 times, then set aside to dry.
- Combine the yeast, soy peptone, Protein, and azomite in a container, and mix in the potato water with the dissolved glucose syrup.
- Place the brown rice into a mushroom cultivation bag, followed by the liquid mixture prepared in step 3.
- Sterilize the contents in a pressure cooker at 15 PSI/121°C for 45 minutes to an hour.
After Sterilization:
- In a clean environment, preferably in front of a laminar flow hood, transfer the sterilized substrate into the takeaway containers by cutting a corner of the mushroom bag. Clean the containers beforehand with boiled water and a generous amount of isopropyl alcohol. Expose the inside of the containers to UVC light for about 30 minutes to eradicate all potential contaminants.
- After filling the containers with the substrate (to a depth of approximately 2 cm), add the liquid culture.
Can i expand the culture in the syringe to more liquid culture?
Yes, you can. Cordyceps does not perform well when expanded or when exposed to light except when it’s fruiting or when it’s kept in a low nutritional environment. Use our LC Supercharge mix to expand your culture, and add around 10 ml liquid to 200 ml Sterile LC to expand. Stir for 4 days and use all content straight away. They cannot be stored once expanded, they will start to die within a week.
What do I do with cordyceps?
Cordyceps are referred to as medicinal mushrooms, meaning they are consumed for health rather than culinary reasons (It is important to note that 'medicinal mushrooms' is not a euphemism for psychedelic. These mushrooms are not psychedelic). While we can't list the medicinal benefits of cordyceps to abide by Australian Law, which is very restrictive in this regard, I am sure you are here because you have heard or know how amazing these mushrooms are and what they are capable of.
How will I know when my mushrooms are ready?
The mushrooms won't be ready for at least 55 days. We recommend harvesting them after 60 days. Another sign your mushrooms could be ready is at least 3 mushrooms are 4 cm in length or above (although this sign is not always 100% reliable).
How do I collect spores of cordyceps?
You will need to get a sterile petri dish to collect cordyceps spores. Put some Vaseline in the inner part of the lid and stick one cordyceps mushroom harvested at 45 days. Close the petri dish with parafilm and let it drop spores on a sterile surface for 15 days. After 15 days, the mushroom would have shriveled up and dropped all of its spores. Collect the invisible spore from the bottom of the petri dish using a sterile cotton swab, and roll it on an agar plate. Watch your spores grow.
Owner of Rootlab



2 Responses
Can i grow these kits in a room with just normal day and night hours? Or do i need to control the light schedule to be 12 day and 12 night hours to get fruiting?
You can grow them in normal day and night hours with indirect light(Artificial light is not required but recommended), no direct sunlight.As long as temp are below 20 they will fruit.